
Stocktake Options
1. Introduction
The ProSKU App allows you to perform stocktakes using handheld devices to increase the efficiency of the process and deliver the benefit of real time updates. Doing a stocktake with the ProSKU App means that other movements – putaway, picking, transfers and replenishments – can continue while the stocktake is taking place.
There are two options for creating a stocktake process. The first option, a scheduled stocktake, is created using ProSKU WMS>Stocktakes>New Stocktake and checking the ‘App’ check box. This will update the ProSKU App with new stocktake instructions, which can be done using functions on the App. Full details on how to do this are available in the online ProSKU WMS User Guide.
However, a stocktake can also be created from within the App itself. In both cases the stocktake results are updated to the ProSKU WMS.
2. Scheduled Stocktakes
Once the stocktake has been created using ProSKU>WMS>Stocktakes, and the instruction issued to the ProSKU App, the process is as follows:
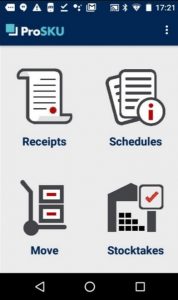


Start by selecting the ‘Stocktakes’ option on the home screen.
All available stocktakes are displayed in a list, showing for each one the stocktake reference and owner detail, if applicable. The circle to the right hand side shows the number of individual location checks the stocktake contains.
If the stocktake has been allocated to a specific mobile user, this circle will be green, to indicate that the movement is reserved specifically for that user. If the stocktake is unallocated the circle will be blue, and can be performed by any mobile user.
After selecting the stocktake you require from the list you are given the ‘walk sequence’ option shown in the screen below:


This is provided for situations where more than one checker is involved in the stocktake. For example if there are 100 locations to be checked, each checker can start at opposite ends of the walk sequence in order to complete the stocktake faster. A single checker can choose either option.
After making the walk sequence selection the first location to check is displayed, as above right:
At this point you are asked to confirm the location by scanning the location barcode, or entering the reference via the keyboard.
You are then asked to confirm the product to be checked, by scanning either the product barcode, or for palletised products, a pallet label. These can also be entered manually via the keyboard.
Once you have done this, enter the quantity in the field provided then confirm the count using the ‘Submit’ button. The screen will display the message “Product count successful” to confirm the count has been logged.


‘Confirm Empty’ check box
If there is no product in the location being checked then instead of entering a quantity simply check the ‘Confirm Empty’ box below the quantity field.
Then, if there are no further products to be counted in that location you can complete the check by selecting ‘Finish Scan’. This is confirmed by the message “A1A00A check completed”. If there is a further location to check this will then be displayed.
However if the location just checked was the last in the stocktake, the message “Stocktake 000000 completed successfully” will be displayed, as below.


Using the ‘Search Location’ Option
After a stocktake has been created and appears on the ProSKU App, there are two additional buttons which appear below the list of available stock checks: ‘Search Location’ and ‘New’ as shown in the screenshots above.
‘Search Location’ can be used as an option to include any locations for checking that are within the selected stocktake, but may be physically nearer than others to be checked, to add convenience and reduce travel time. This could apply where the checker is familiar with the stocktake, for example where a specific range of locations or goods for a particular owner are regularly checked.
After selecting the option you can scan a location, and are prompted to enter the details in the usual way, as above centre. When you have completed the check for the selected location by using ‘Submit’, and ‘Finish scan’ the message “A1A00A check completed” is displayed, as above right.
If the location checked was also the last in the stocktake the message “Stocktake 000000 completed successfully” is displayed.
The completed location(s) are then omitted from those remaining to be checked, but when the entire stocktake is completed, the count for all ‘searched’ locations are included in the stock check results. The function can be used at any point during the stocktake i.e. while locations still remain to be checked, by exiting the stocktake and reselecting the ‘Search Location’ option on screen.
3. Ad-Hoc Stocktakes Using the ‘New’ Option
Ad hoc stocktakes can also be initiated (with correct movement permission) from within the App whenever required. With this type of stocktake there is no pre-selection of criteria, and it is purely based on the locations selected by the user performing the stocktake.
Once created the active stocktake will appear on the list within ProSKU WMS>Stocktakes and can be done in the same way as one initiated from the WMS, including the facility to issue a recheck (see Using the Re-check function, below) when required.
To begin a user-initiated stocktake use the ‘New’ button on screen. This will present the following screen below left, into which any header information can be added.


Once you have entered any header detail required, select ‘Save’ to create the stocktake. The message “Stocktake 000000 created successfully” is displayed, followed by the screen above right.
At this point you can scan the barcode for the location you want to check or enter it manually via the device keyboard, then select ‘Submit’. The subsequent procedure is the same as for other stocktakes, i.e. to identify the product or pallet, followed by entry of the quantity counted.
When you have done this select ‘Submit’ to confirm the count. You then have the option to continue the stocktake by scanning further locations or to select ‘Finish Stocktake’ to complete it.


4. Stock-take Re-check Function
When a stocktake is created, using either ProSKU WMS>Stocktakes or the ‘New’ option as above a viewable record is created within the ProSKU WMS. When the stocktake has been completed the results are displayed, as shown in the screen below.
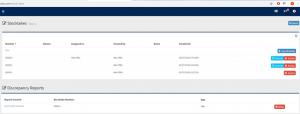
Where the stocktake has been completed successfully with no discrepancies it will be displayed with a single red ‘Archive’ button to the right of the line. This means no further action is required because the stock count has correctly matched the system figures.
Where the stocktake has revealed discrepancies between the system figures and the physical count the line is displayed with an extra blue ‘Recheck’ button to the right. The system will also generate a discrepancy report which is shown in the section below the listed stocktakes.
Displaying the stocktake by clicking on the line will show those lines containing discrepancies. These are shown with a red highlight to distinguish them from lines with no discrepancies, highlighted in green as per the screenshot below.
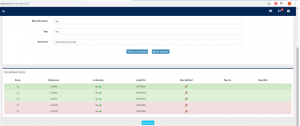
The quantity differences relating to discrepancies are available by generating the discrepancy report in PDF format, which can be printed if needed for further investigation.
A stocktake ‘recheck’ can be generated by selecting either of the blue ‘Recheck’ buttons. This will generate a recheck for only those locations which have shown discrepancies, and will retain the reference used for the original stocktake.
A recheck can be generated as many times as needed, but the stocktake will not be completed while discrepancies remain. However the discrepancy report can be deleted at any point after its creation.
Archiving the Stocktake
A stocktake can be archived once it is completed with no discrepancies, or otherwise if you choose to accept and archive it with identified discrepancies. If stock adjustments need to be made as a result of these they can be done via ProSKU WMS>Adjustments. Archived stocktakes are held on file and available to view using the ‘Search’’ facility.